Metal for Compute
This blog post describes how to use Apple’s Metal API for computation on a GPU in a C++ project. The accompanying repository is say4n/metal.compute and is based heavily off of Apple’s Swift/Objective-C original tutorial for performing calculations on a GPU.
Be sure to check them out!
before we get started
Head over to Apple’s getting started with metal-cpp guide and follow the
instruction in the section titled “Step 1. Prepare your Mac”.
Additionally, make sure to also follow the part of the instruction that describe how to use metal-cpp as a single
header include (section titled “Metal-cpp single header alternative”) in a project.
We will be using Xcode for development, I used version 13.2.1 (13C100).
getting started
At this stage, this post assumes that you have the metal-cpp sources extracted to a convenient location and that you
have executed the command to use metal-cpp as a single header include by following the steps described previously.
The next step is to set up an Xcode C++ project.
setting up an Xcode project for C++
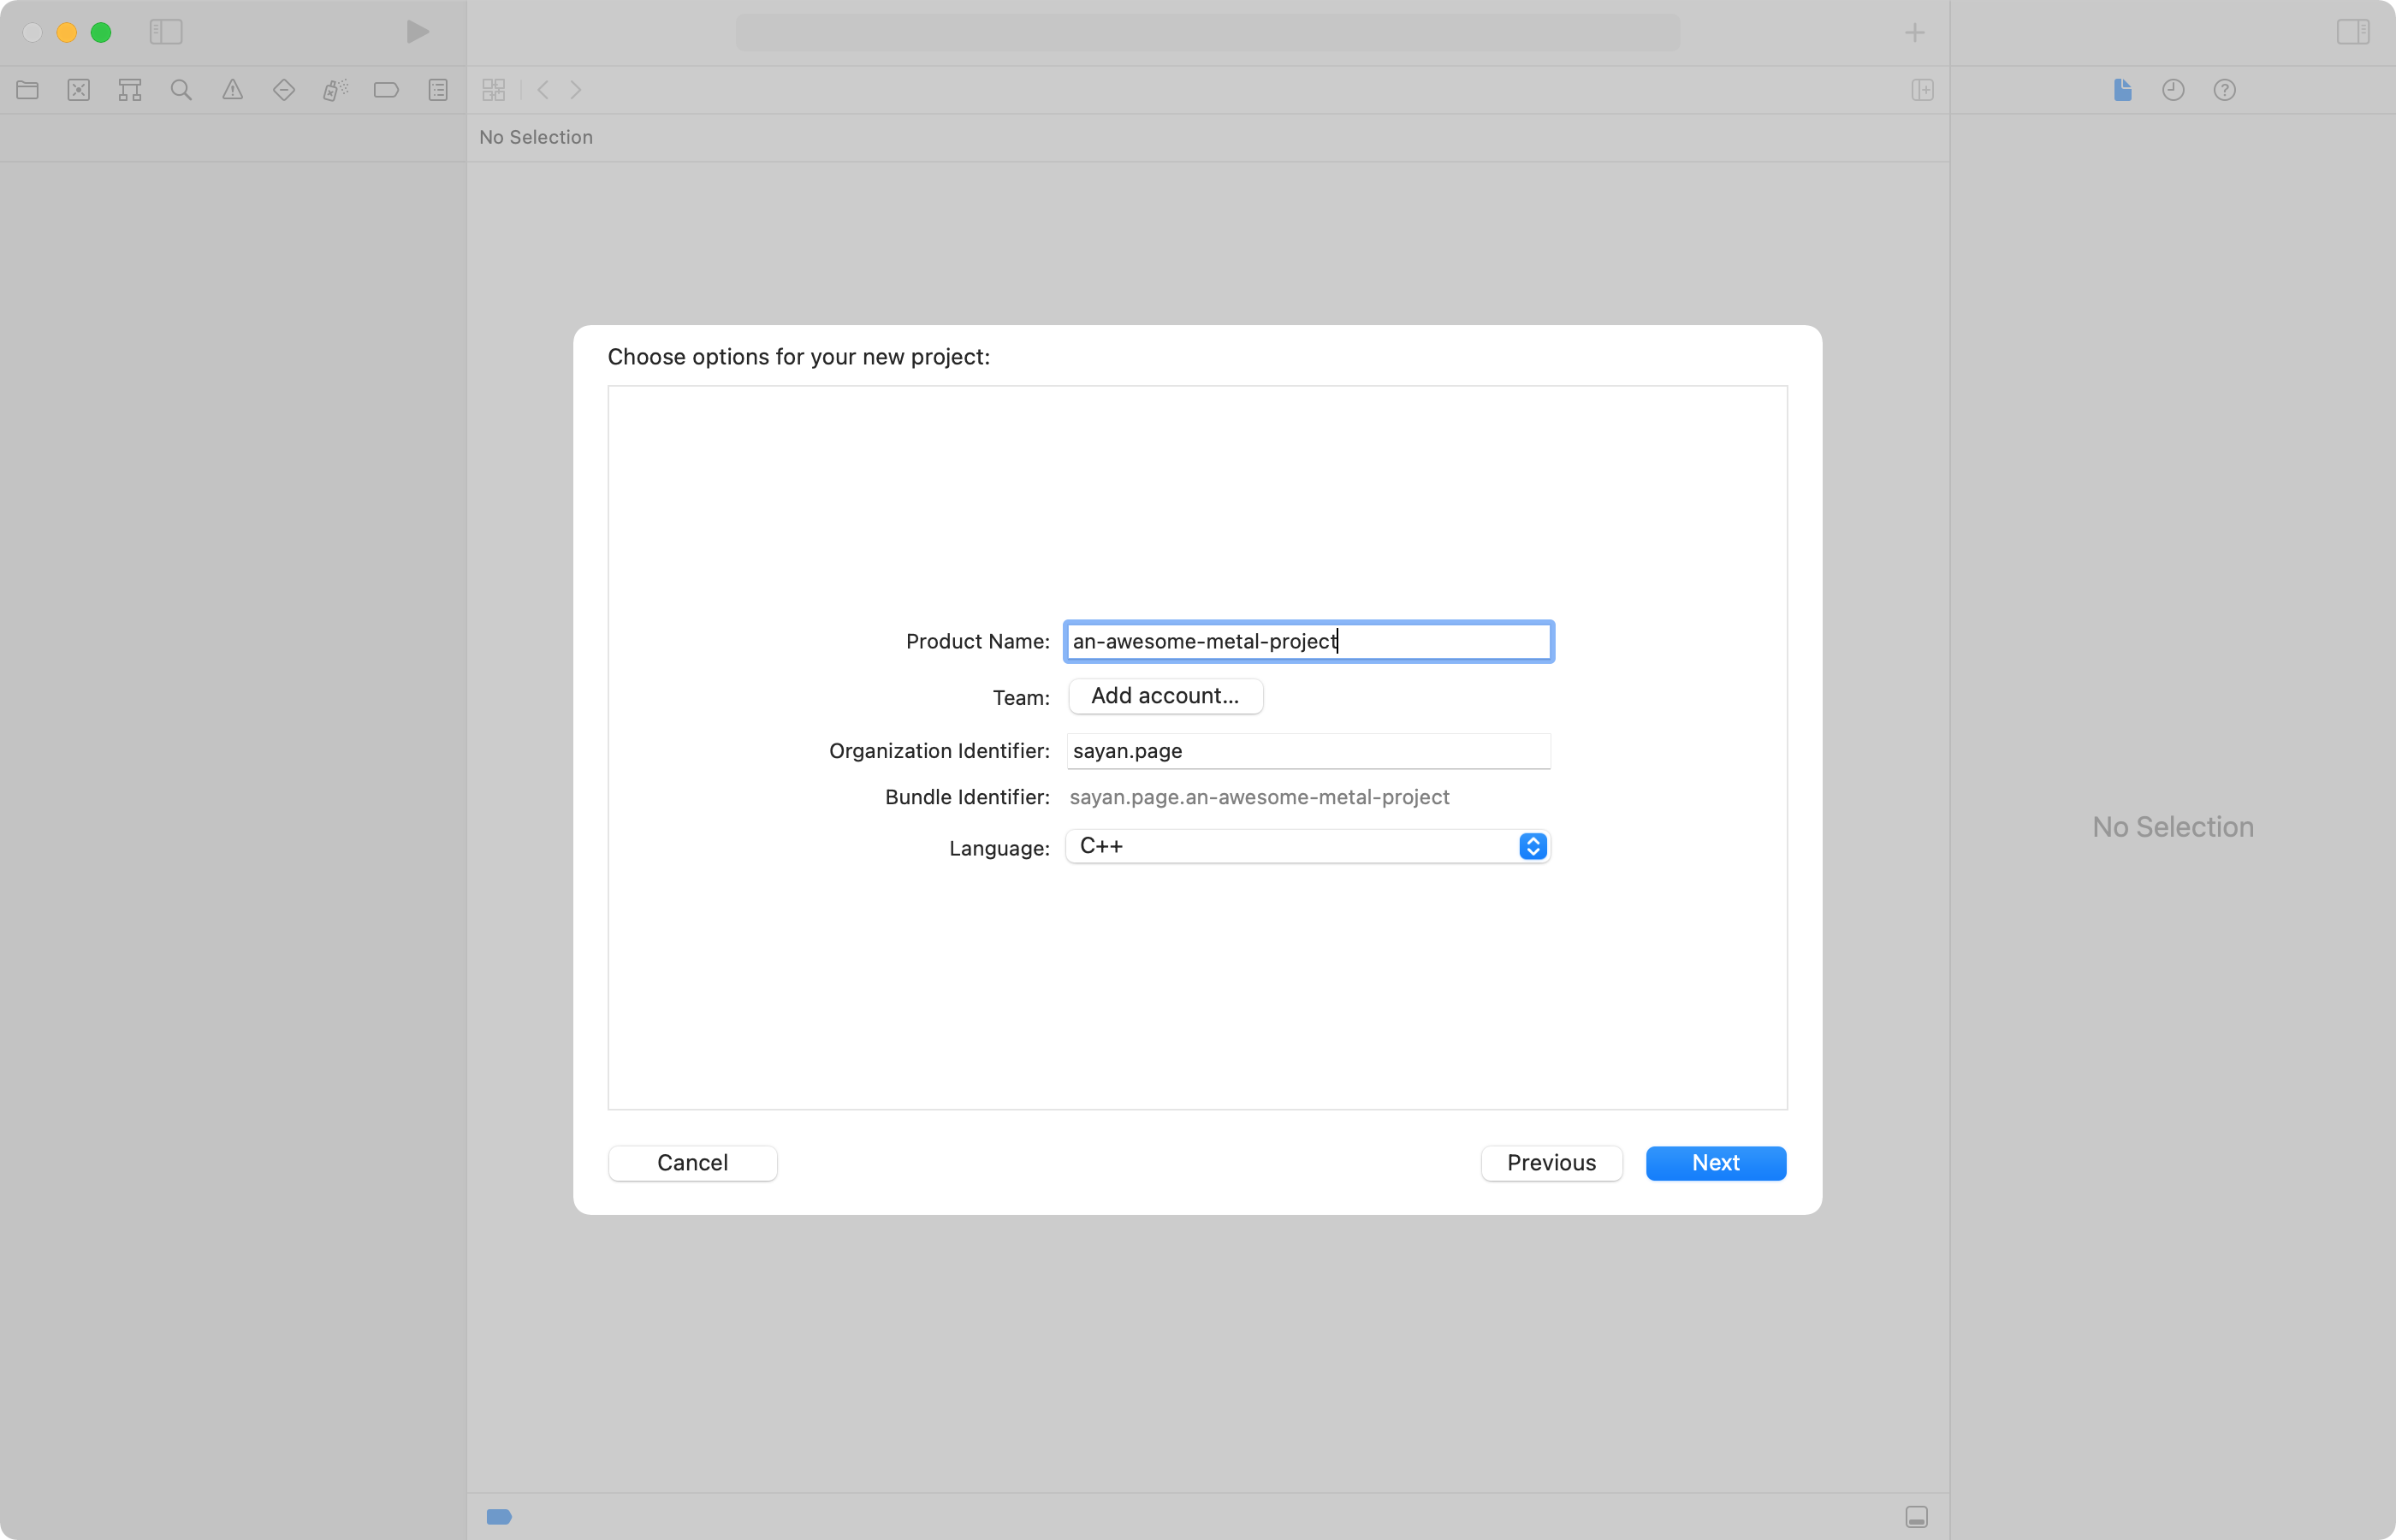
Create a new project with the command line application template in Xcode with macOS as the target platform.
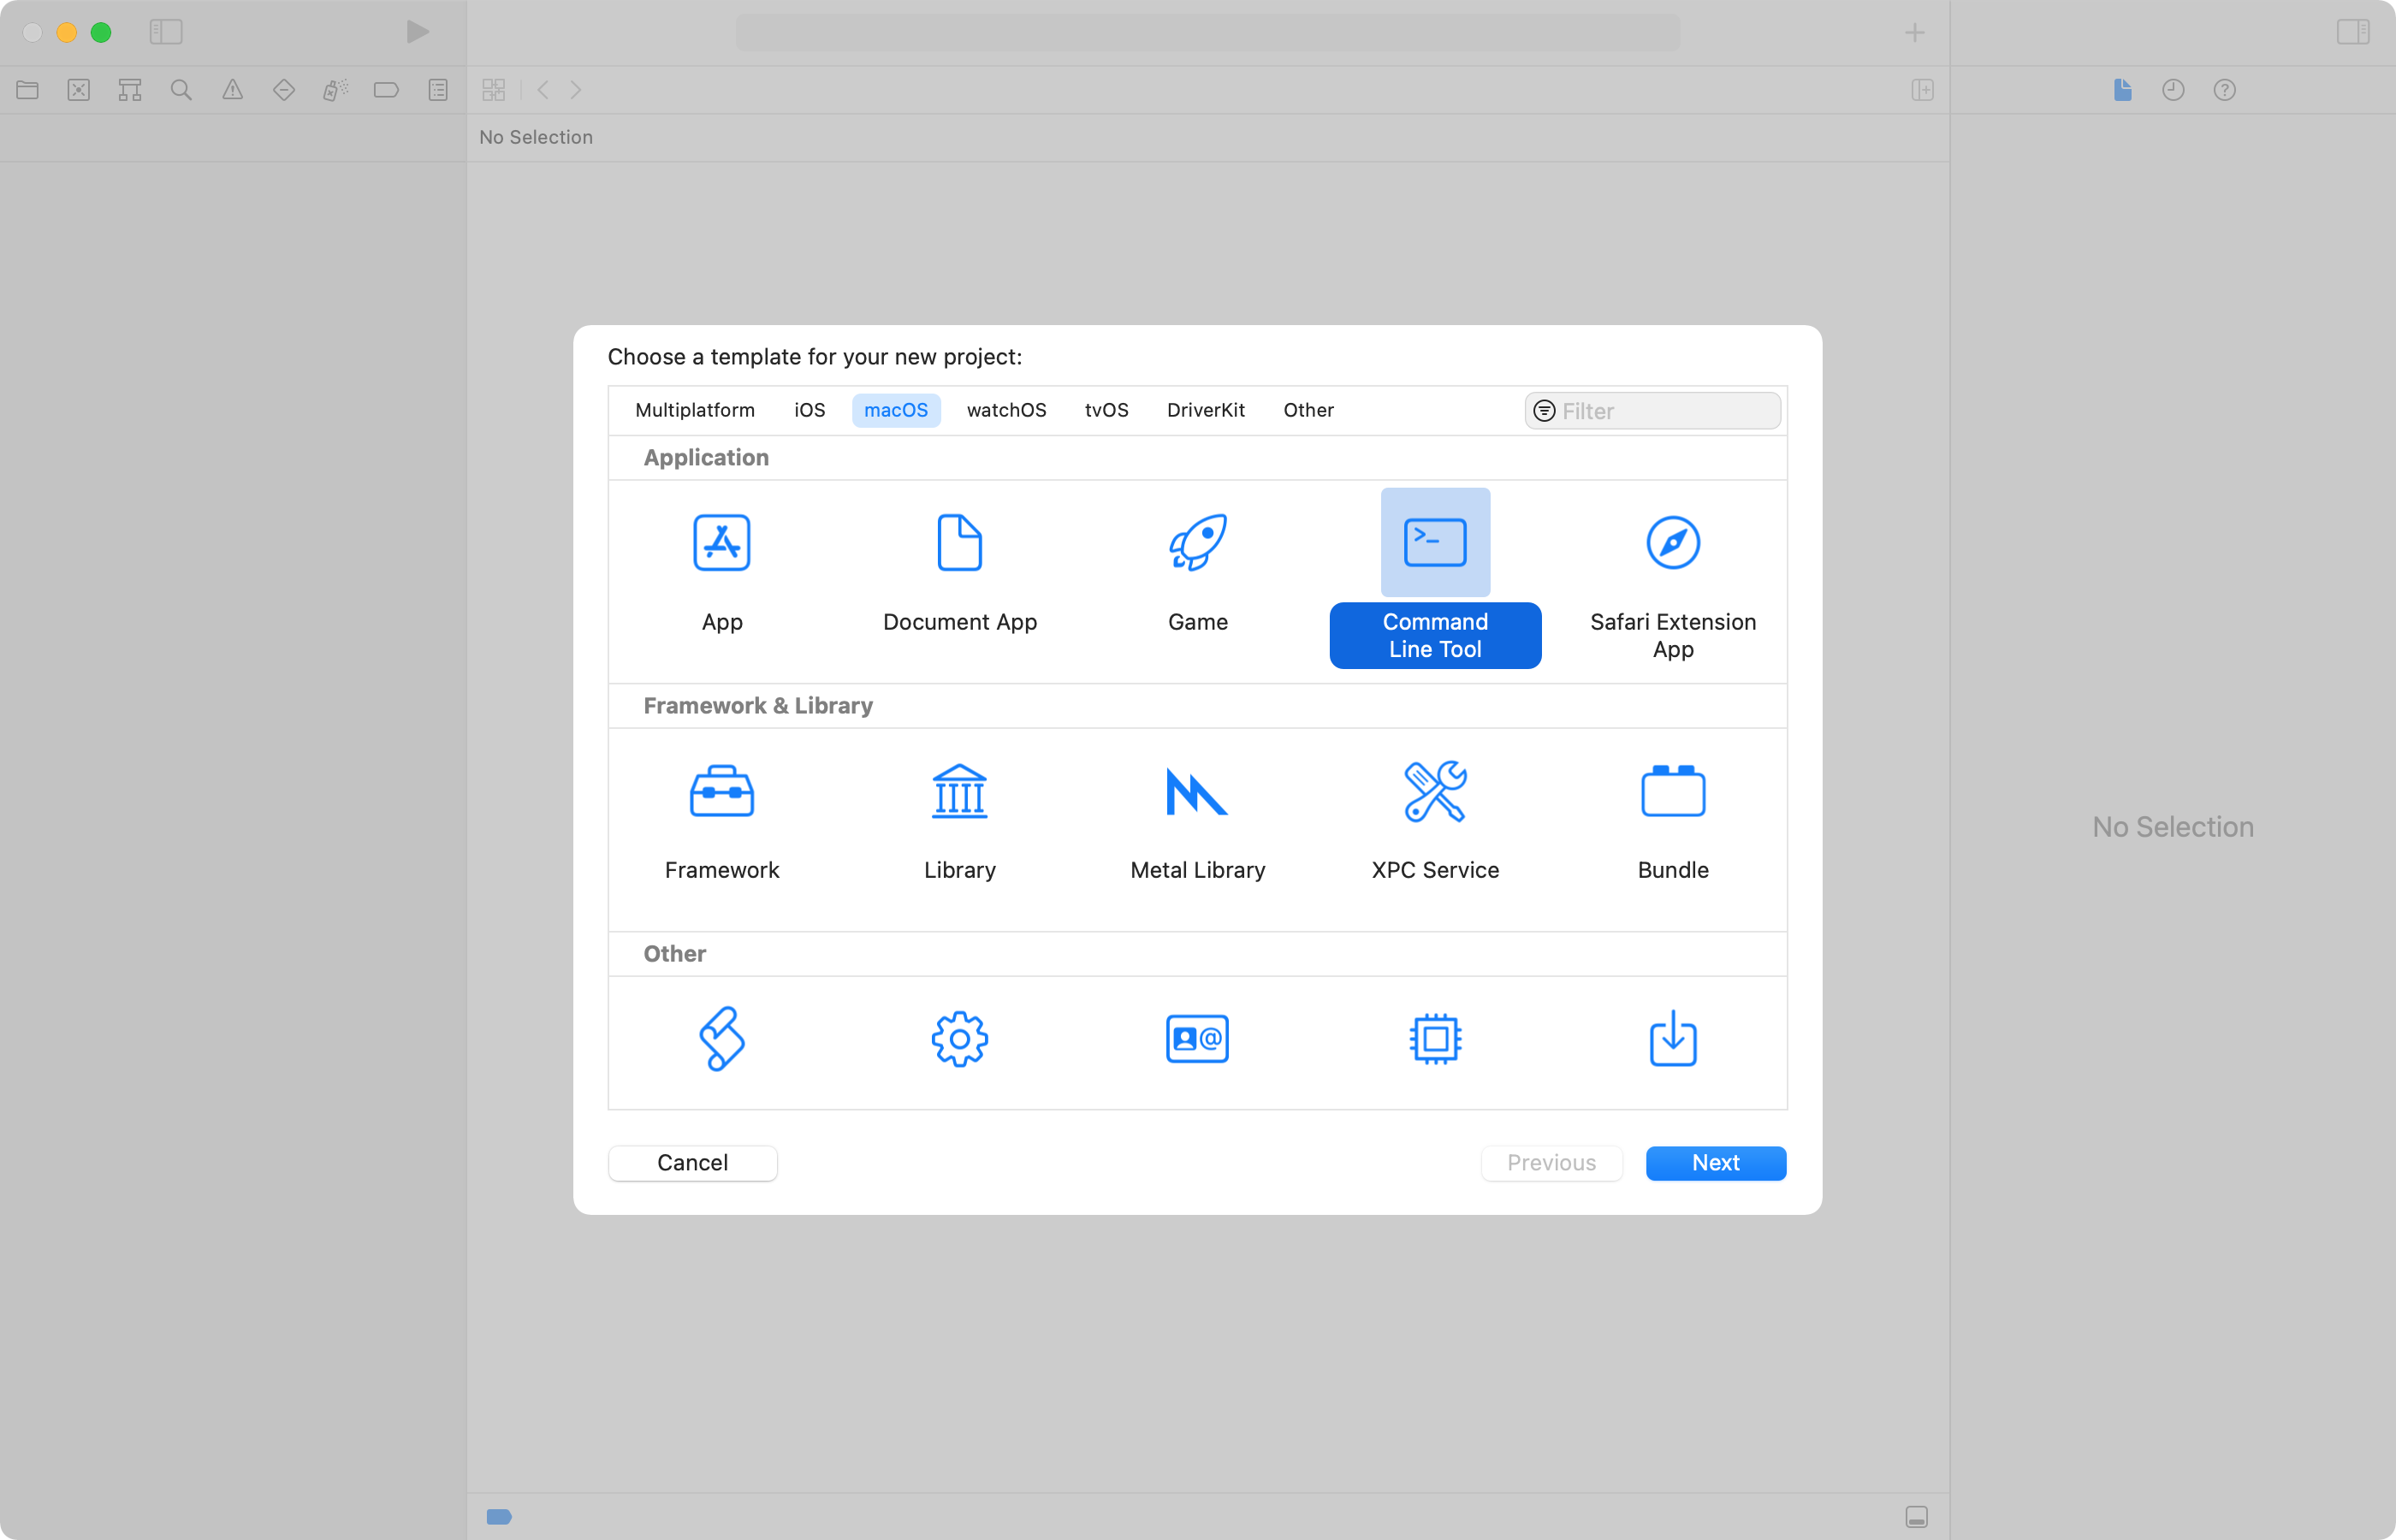
Make sure to select C++ as the language!
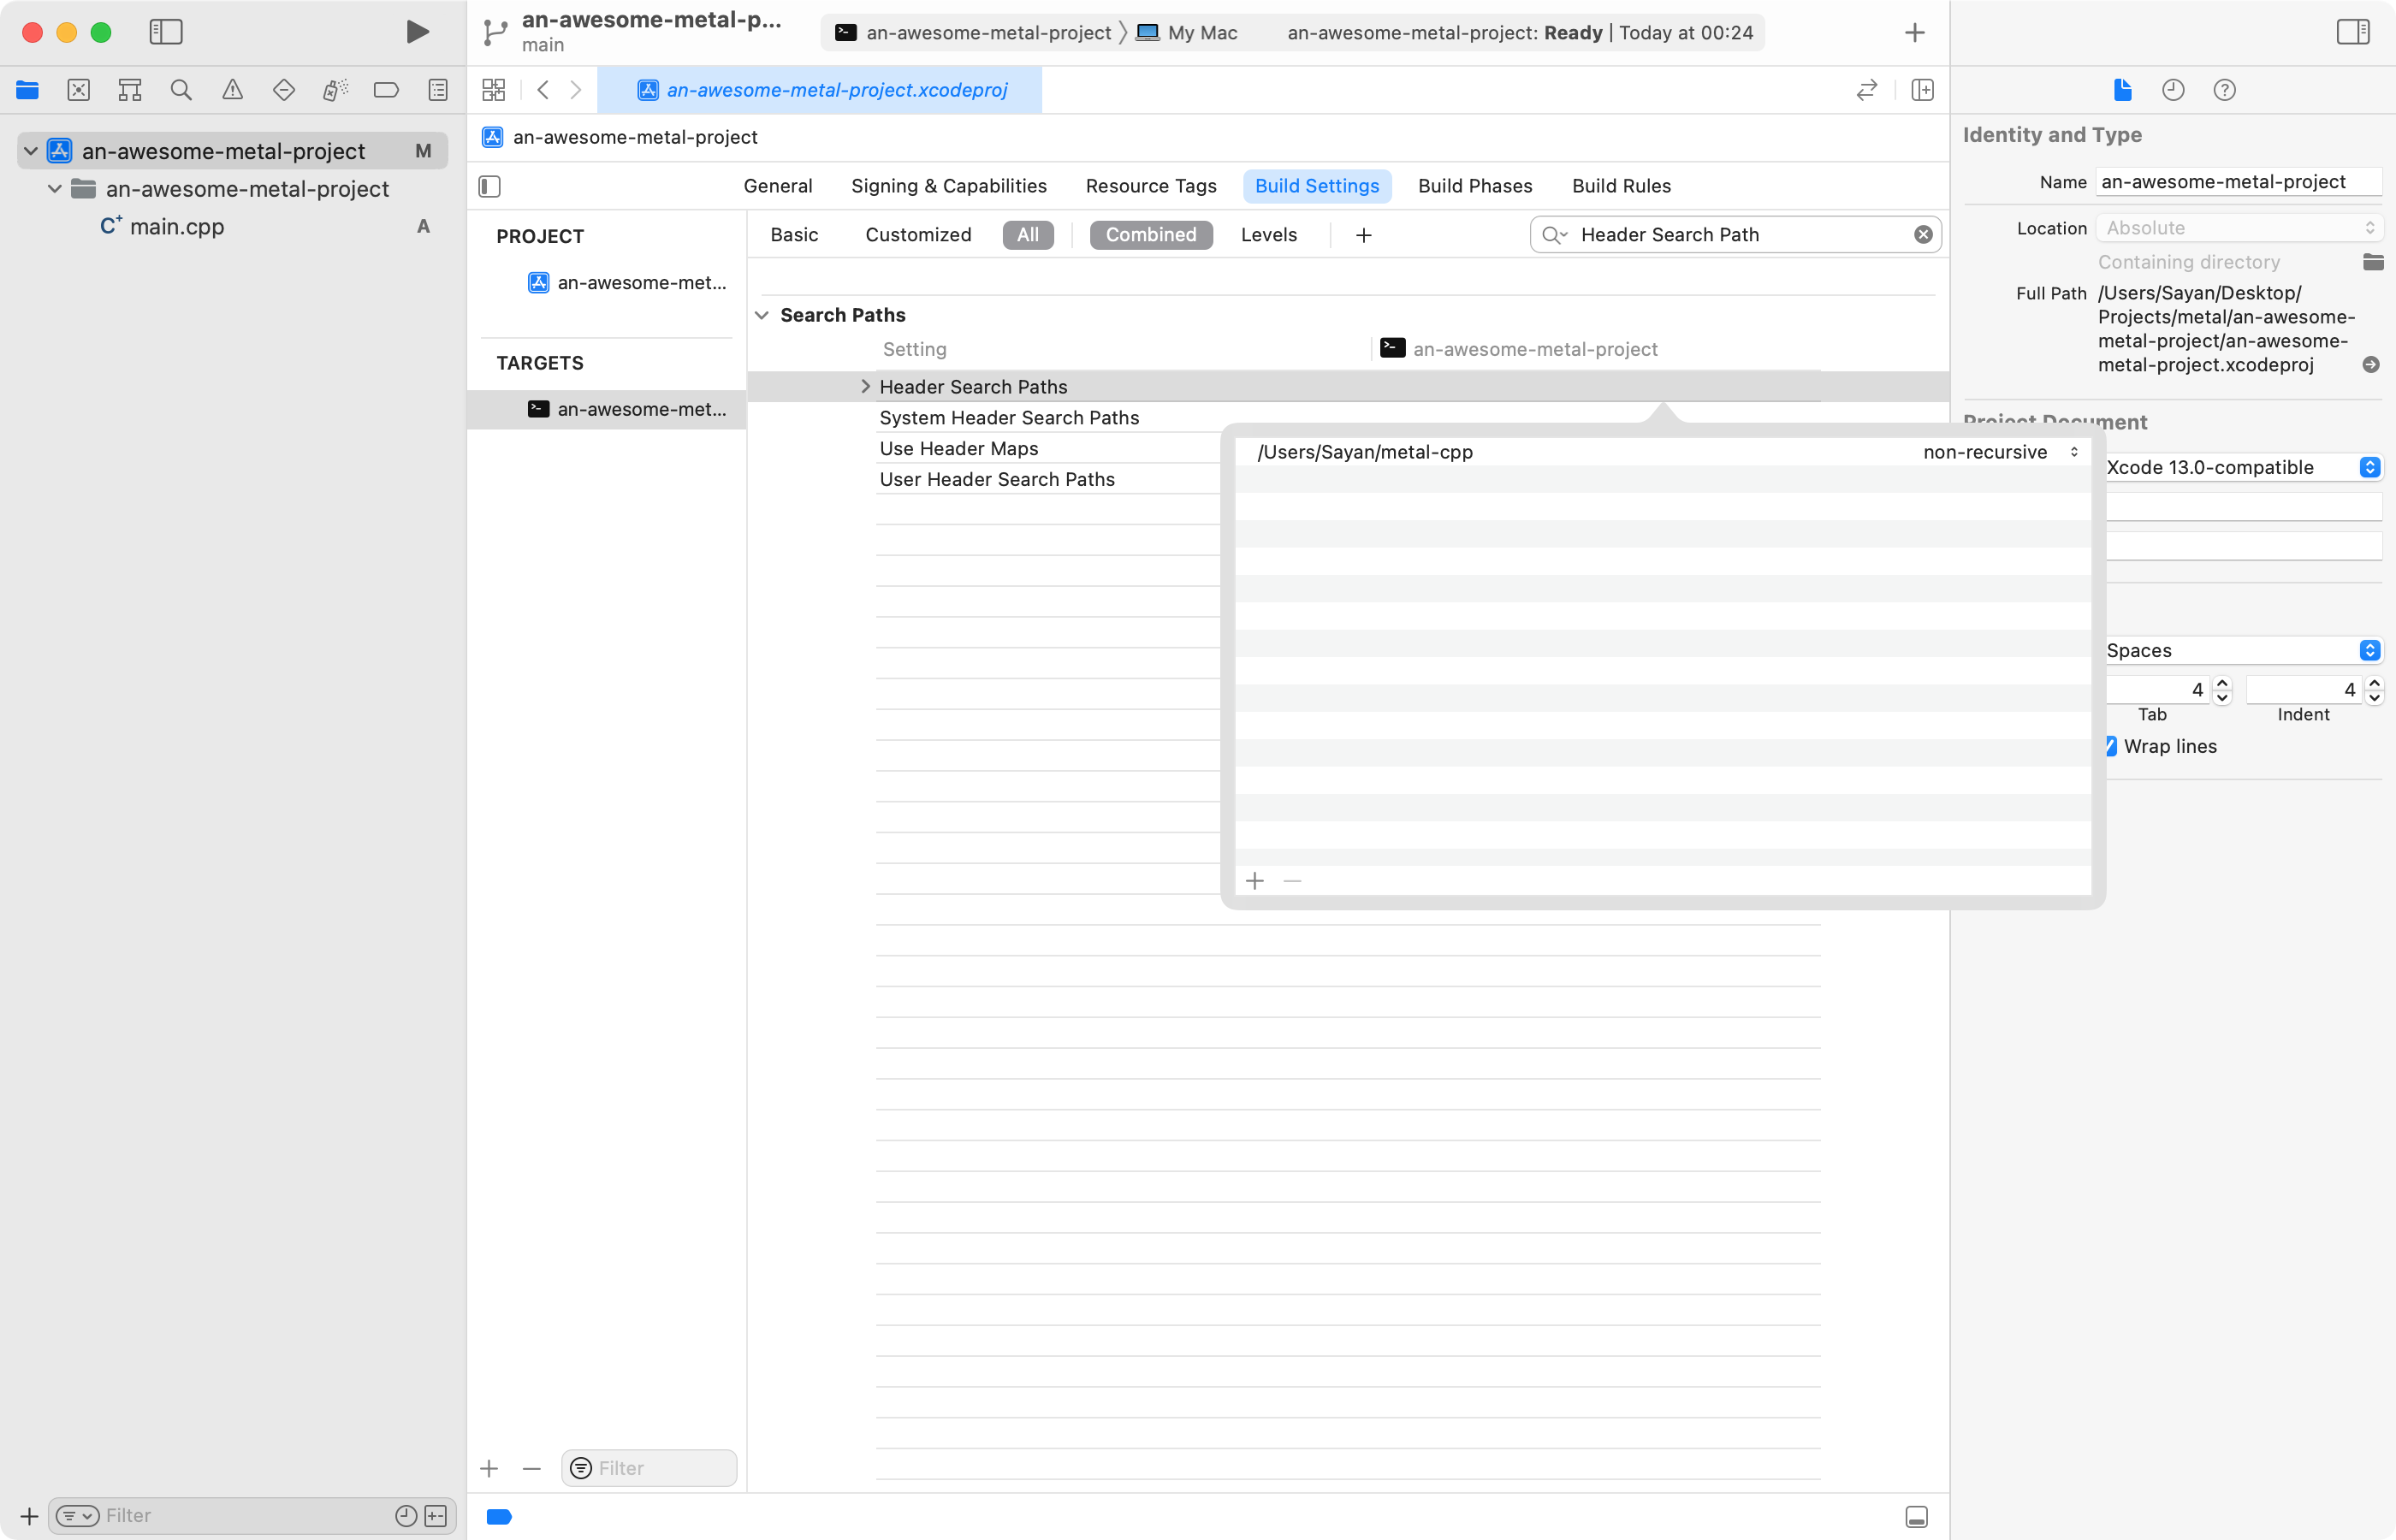
configuring Xcode to use metal-cpp
In the build settings tab under the project navigator, search for the “Header Search Path” and set it to the base directory where you extracted metal-cpp.
Next search for “C++ Language Dialect” and set it to C++17 or higher.
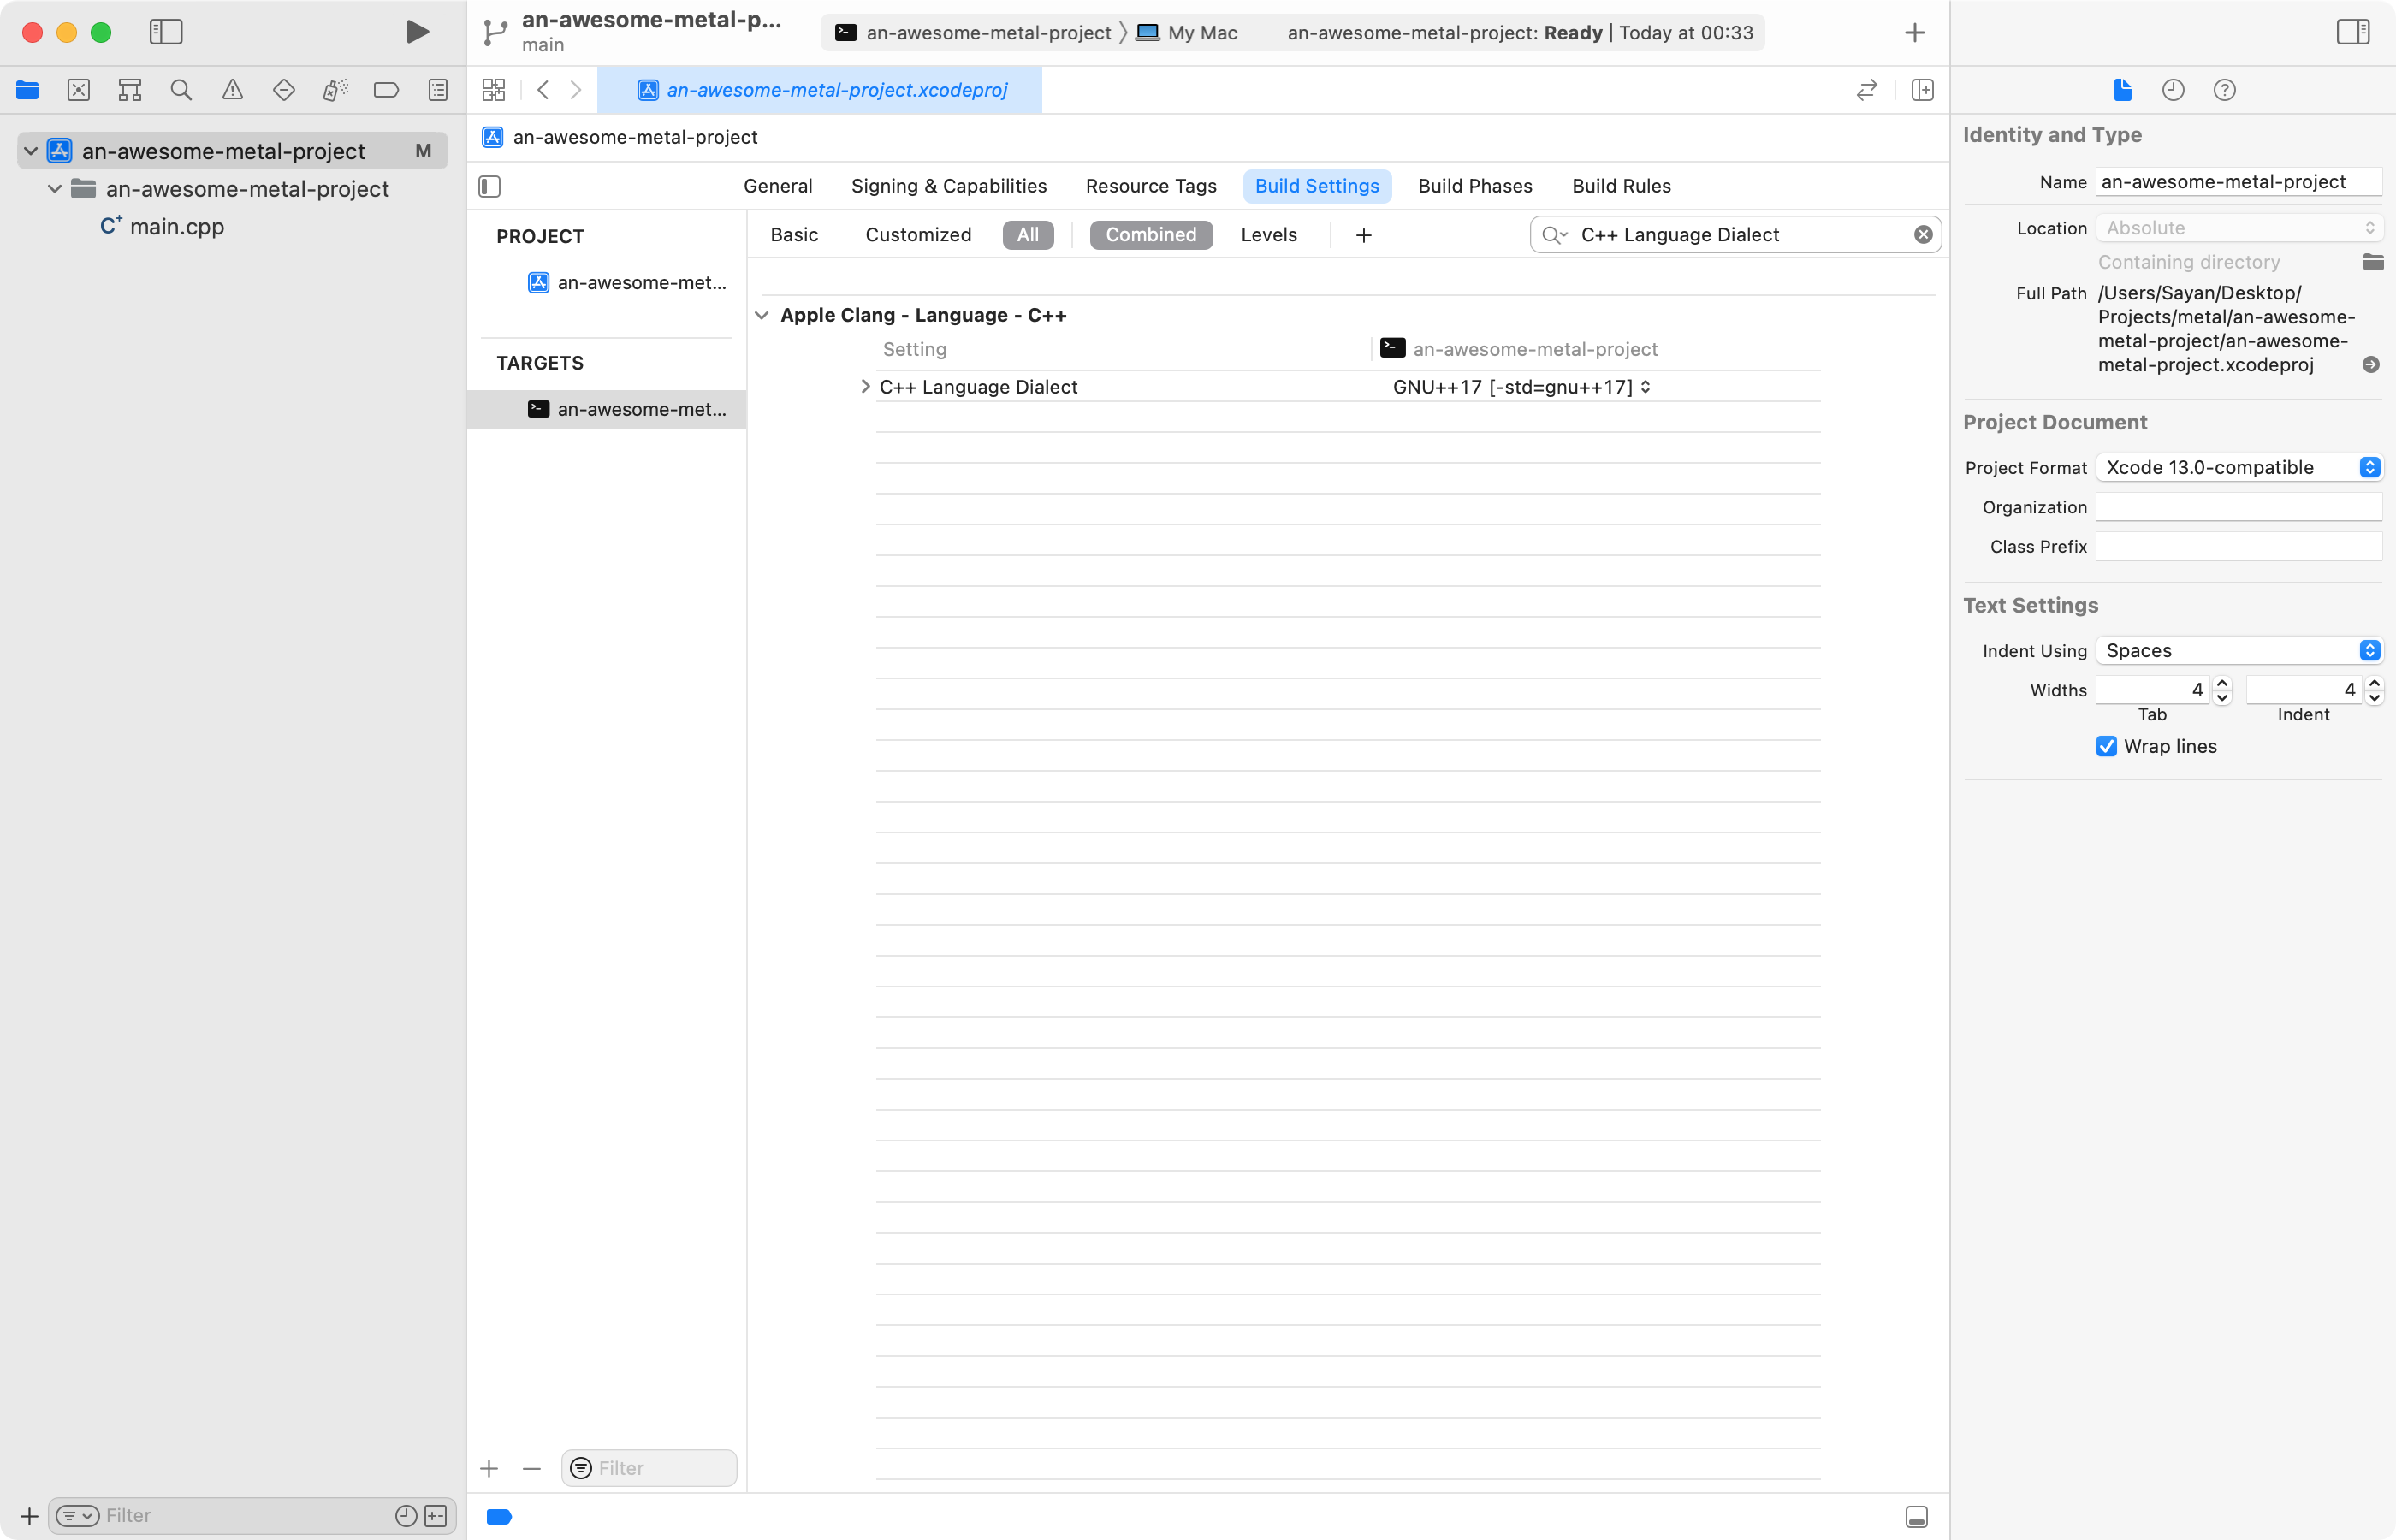
And that’s it, we are now ready to use the metal-cpp to interface with Apple’s Metal API in our C++ project.
the metal shading language
Our tiny metal program will perform the very basic operation of multiplication. To that end, here is the code that defines the operation in the metal shading language.
//
//  compute.metal
//  metal-test
//
//  Created by Sayan on 28/12/21.
//

#include <metal_stdlib>
using namespace metal;


kernel void work_on_arrays(device const float* inA,
                           device const float* inB,
                           device float* result,
                           uint index [[thread_position_in_grid]])
{
    result[index] = inA[index] * inB[index];
}
What this does is it takes array elements from two float array inA and inB and stores their product in a third array result.
You can read up more about the metal shading language in its language specification here.
You can also follow Apple’s Swift/Objective-C tutorial for performing calculations on a GPU for a better introduction to programs in the metal shading language.
the driver code
Now that we have defined our compute operation, we need to write the driver code that actually makes it all happen! The files of interest and their respective functions are described in the following sections.
main.cpp
This is the main file that ties everything together.
It instantiates an NS::AutoreleasePool and a MTL::Device object.
It then instantiates an object of the compute wrapper class that we describe below.
Then it passes the Metal device to be used for compute to the said wrapper class.
The data for the compute operation is then prepared and the compute command is send.
Finally, the NS::AutoreleasePool is released.
metalComputeWrapper.hpp
This defines the metalComputeWrapper class, a wrapper class that takes a MTL::Device and performs operations define by the kernel in metal shading language.
It also prepares the various buffers as well as the data required by the various operations defined in the compute kernel.
It also verifies that the results produced after computation are as expected and lie within a margin of error.
metalComputeWrapper.cpp
This file contains the implementations of the various member functions of the metalComputeWrapper class.
Note: This blog post is a Work in Progress and content may be added to it from time to time.